Metal Building Insulation Repairs and Replacement
Insulation Services Available Nationwide Call 713-449-3430
When To Repair?
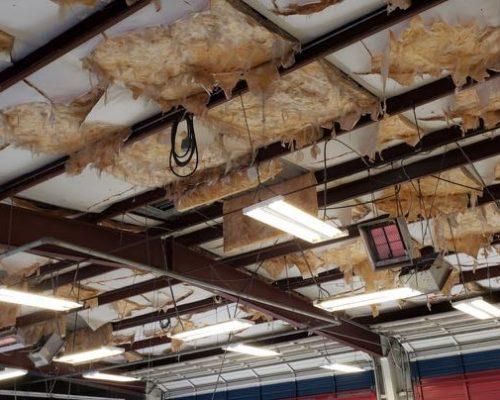
This metal building insulation needs to be repaired, which will help keep the building cool!
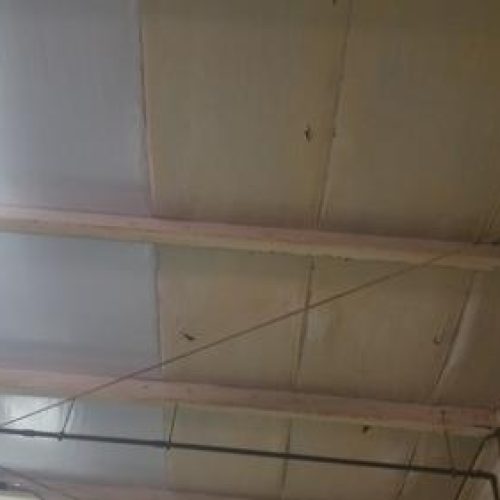
If you see this happening, it is due to the original metal building facing not being reinforced.
When the oil in the facing becomes dried out, it shrinks and rips. Repairing metal building facing and the damaged insulation.
Metal building insulation repair. This is a picture of the ceiling of a service area of an auto dealership.
Our Approach
What’s the Best Way to Repair Damaged pre-engineered metal building insulation? Answer – It depends
So how do you repair metal building insulation? Will tape hold damaged facing in place? Is this repair service available locally? Are there any companies that specialize in these repairs? We will answer these questions below.
Replacing metal building insulation from the exterior
Sometimes your business doesn’t allow for the insulation to be replaced from the inside. You may have machines and equipment in the way, or processes that can’t be interrupted. Whatever the reason, insulation can be replaced from the exterior. It’s a little less expensive and in addition to the new insulation the fasteners on the roof are replaced. There is a couple of differences in the results. One, from the exterior the insulation can only be 3 or 4 inches thick. The other is the look of the insulation at the completion of the repair. Typical R value R10.
Retro-installing additional metal building insulation from the interior
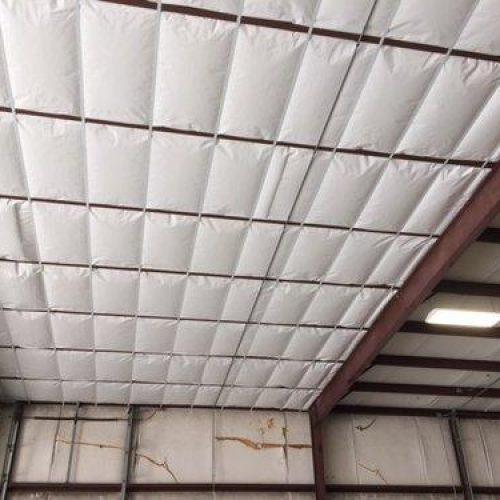
Adding R value to metal building insulation! This approach involves installing nylon straps perpendicular to the purlins 2’ on center attached to the underside of the roof purlins. Closer at the columns and adding trim as necessary along the walls. The fiberglass insulation secured to the white polypropylene facing needs to fill the space between the bottom of the purlin and the existing insulation or roof panel. An air space can cause condensation. Any old facing also must be made breathable – two vapor barriers can allow condensation to occur. The typical R value at completion is between R25 and R35
The picture below shows insulation replaced in both
the roof and the walls from the exterior
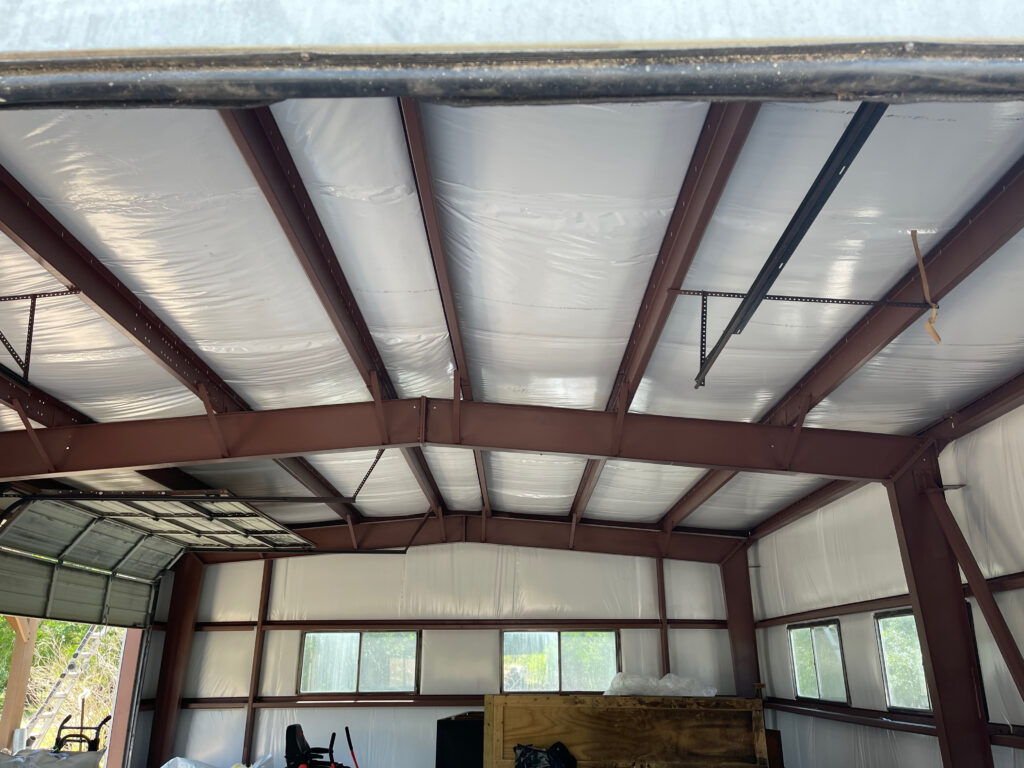
The picture below shows an installation in process. All
the straps are installed.
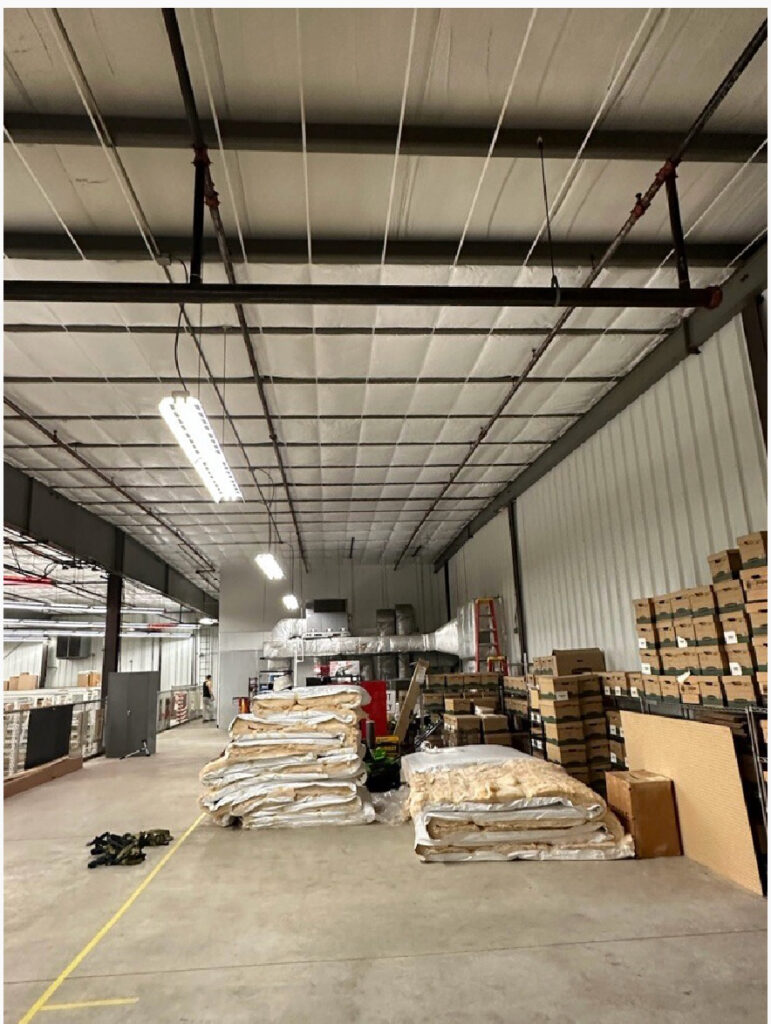
Patching damaged insulation
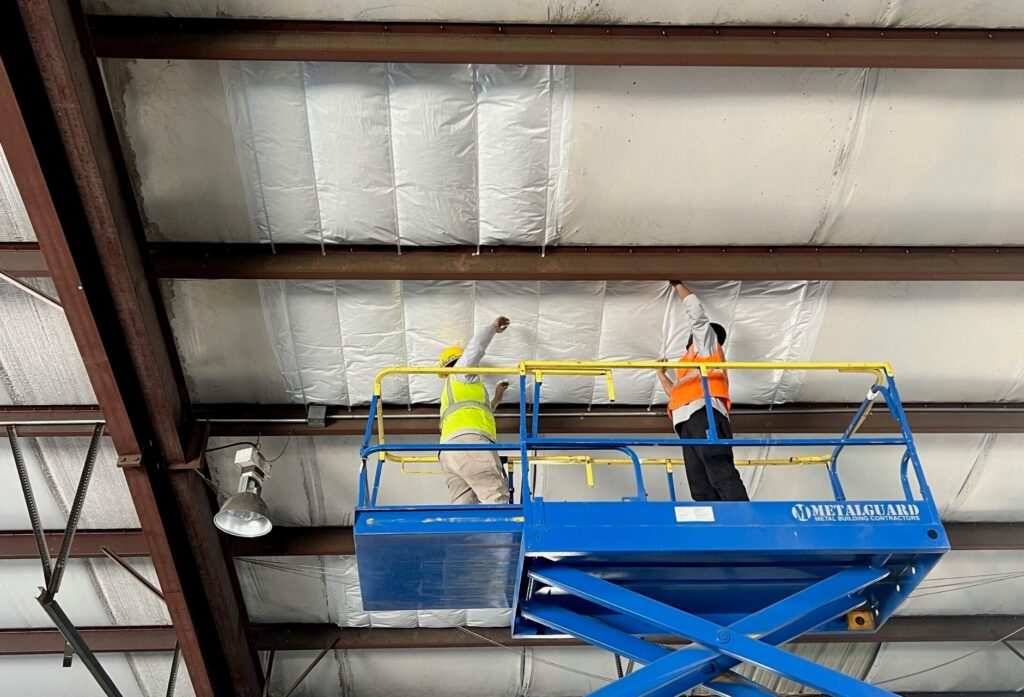
Sometime the insulation damage is localized, and a complete roof/ceiling repair is not necessary or not budgeted. In these situations, smaller areas can be repaired. The repaired area may look different from the existing insulation. When the repair is made from the bottom of the roof, insulation tape is not a long-term fix. Tape will work covering a hole, but it would not hold up any weight over a long period. Straps must be used
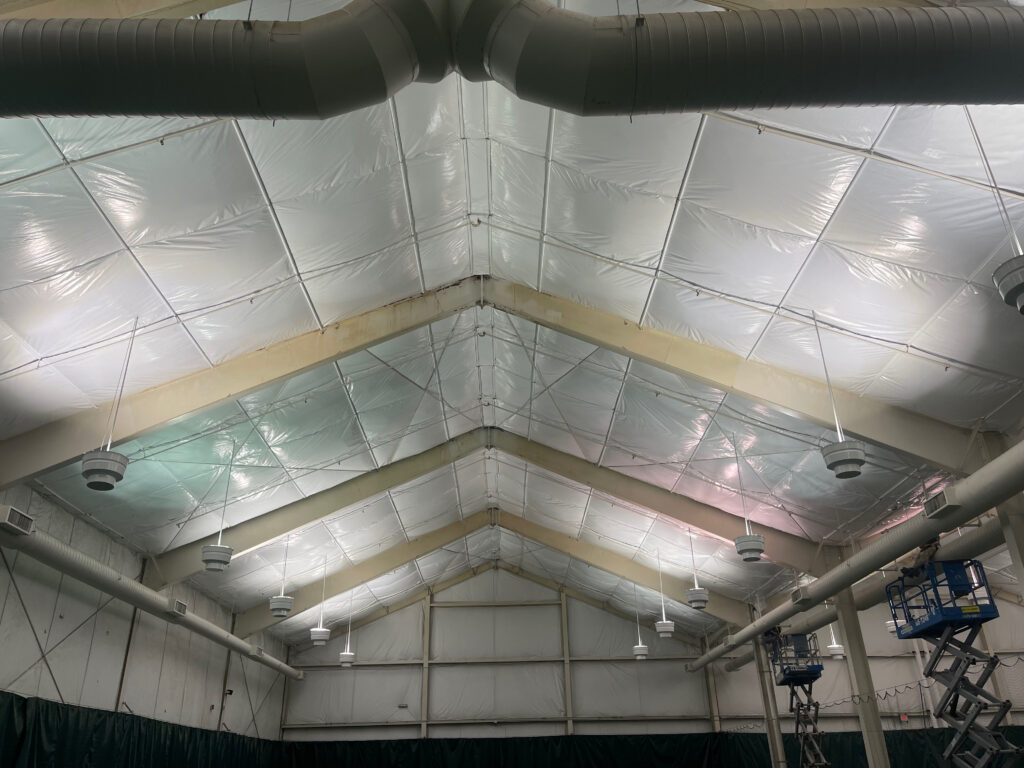
Below – facing over the top of old facing – This was a previously installed insulation system over a tennis court. We installed insulation over the entire old surface.
Installing facing over existing insulation
Another common repair is installing facing over existing facing. This is done when the facing is in place, but maybe it has holes or is discolored. We can install just the facing over the top to give it a clean look.
In the picture below the facing was installed horizontally, we were able to avoid having seams.
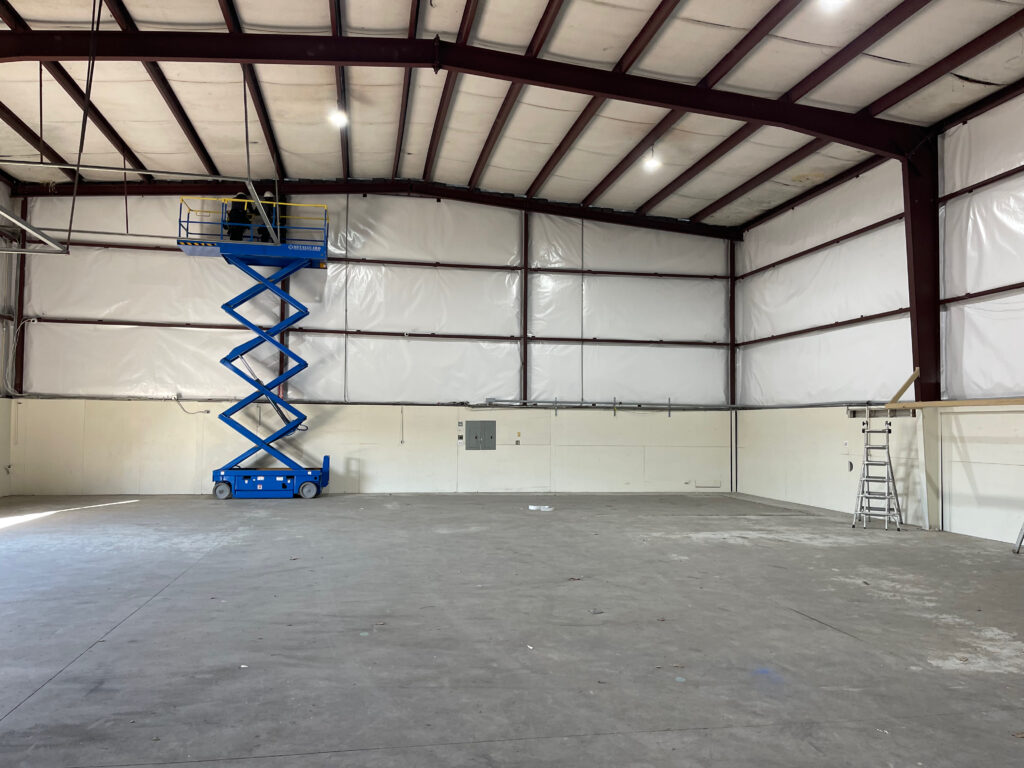
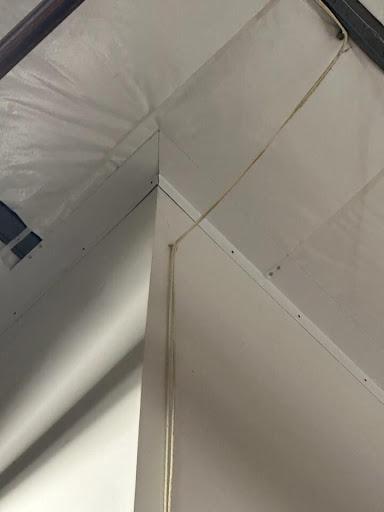
In the picture above facing was installed over existing damaged facing – but held in place using trim. The trim held the facing and tape over the trim and facing helped hid the repair.
Approach 1
One is to remove the panels, remove the old insulation, and replace it with new insulation. When the old panels are removed, new larger fasteners are used to put them back together. If the insulation has aged like this, the roof will benefit from new fasteners.
Approach 2
The second method is to retro-install insulation from the inside. There are advantages to each solution. When installing retro insulation, the R-value can be increased to a much greater value. When installing the insulation by removing panels, there is less intrusion into your building.
Metal Building Insulation Replacement
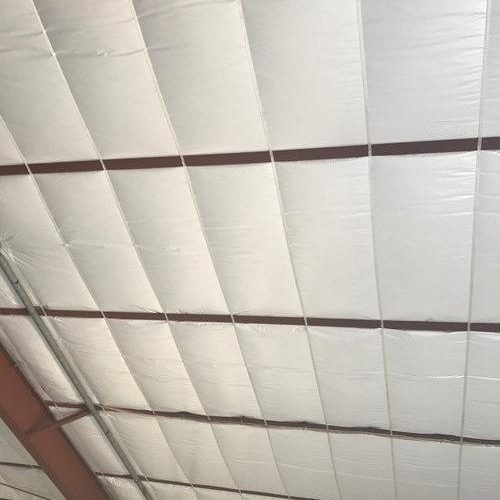
Here is the ceiling picture after the metal building insulation replacement was completed. We installed 4” insulation with a WMP-50 reinforced facing. This was repair was completed from the outside. The insulation was installed between the roof panels and the purlins, and new fasteners and caulk tape were installed.
At completion, this is how the ceiling looked. After a picture of a metal building insulation repair. Completed January 2019. White-faced metal building insulation was installed between the roof purlins and the metal panels on this pre-engineered metal/steel building. This repair will help keep the building cool.
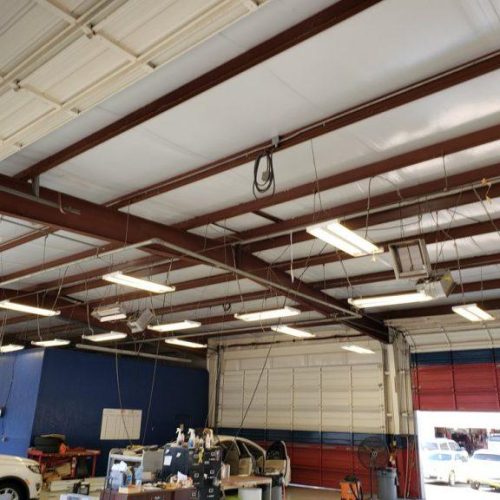
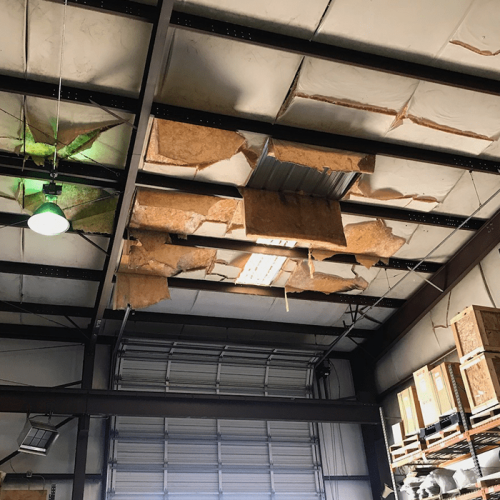
The Damaged Metal Building
Metal building insulation renovation, repair, and retrofit. Old dirty, moldy metal building insulation before a renovation retrofit. Replacing insulation can make your building look like new! It will also smell better!
Metal Building Insulation Repair
Insulation with a white facing after renovation. Bright, clean and new metal building insulation retrofit with 4 inches of insulation and an R-value of 13.6. There are different facing colors to select from based on your needs. Side by side, 1/2 of the metal roof has been replaced including new insulation. After, steel posts and wall girts cleaned and painted. Then new metal building insulation was installed, increased R-value, new look. Clean! Houston, TX.
Furthermore, metal building insulation replacement, view from the roof. New insulation has been installed.
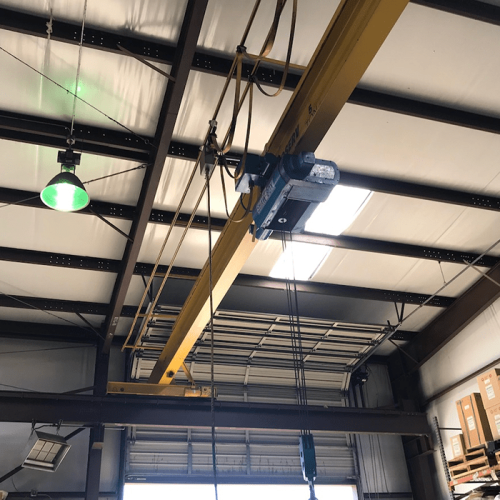
A complete metal building renovation was performed by the Metalguard. New floor coating, walls and columns painted, new lighting system, 8” insulation, R-30, retro-installed insulation into the ceiling in this metal building. It is beautiful and was completed in January 2019. This helps to keep the building cool.
After
Chronologically focusing on insulation with a white facing after renovation. Bright, clean, new metal building insulation retrofit. With 4 inches of insulation added and an R-value of 13.6, there are different facing colors to select from. After, steel posts and wall girts were cleaned and painted. The new metal building insulation was installed, increasing R-value’s new look. Further, in the last picture, the view of the ceiling looks like new insulation after half of the roof has been replaced, including an insulation changeout.
Houston, TX
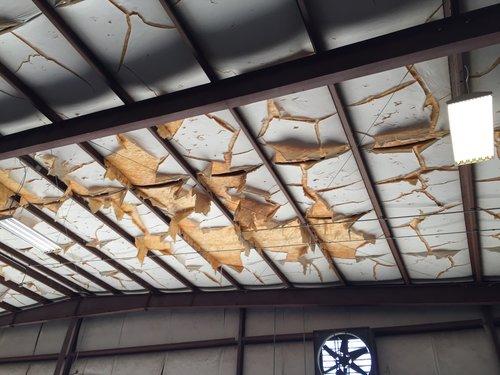
The Damaged Interior
In cases where more than 4″ of insulation is required, this can be accomplished from the inside of the building. In this case, the old insulation was cut out. Nylon banding was installed to hold the insulation in place, and 8″ of new insulation with new white vinyl facing was installed.
Interior Insulation Retrofit
We picked up the roof panels, replaced the insulation, then re-installed the insulation. New insulation is so bright and reflective that it makes taking a photo quite a challenge. This building is located at the Port of Houston. We just completed a renovation here. It includes retro insulation, 8” thick – R-29, along with floor-coated steel and walls painted that changed out the lighting system.
Houston, TX

Metal Building Insulation Renovation Replacement
To help cool the metal building, insulation can be replaced either by removing the outside roof or wall panels or from the interior. Due to the configuration of interior elements, the insulation is difficult to access the exterior approach may be necessary. We have completed many retro insulation projects. Roof and wall insulation were retro-installed in the building. Metal building insulation repair and replacement.
Previous, current, and old insulation was ripped, torn, and falling down. If insulation is added by peeling back the panels and installing the insulation, you will achieve the same look as if it had been completed during the original construction.
Available Facing Options
You can select a facing strong enough to withstand a hockey puck or a soccer ball based on your needs. Less expensive standard facing is also available. There are also different color options, but the options are limited. The R-value you can achieve is based on your needs. While changing your insulation, this is a great time to paint your frame.
How Will Adding Insulation to a Metal Building, Affect the Internal Temperature?
For the past 20 years, we have looked for some independent companies to provide us with data on this subject. A utility, federal or state tests, a building manufacturer, or an insulation company. The best we have come up with is 10 to 15 degrees. That is the number our insulation manufacturer provides us with. That’s based on a 3″ thickness.
It is typically one of the first questions we are asked when someone is interested in renovating a building to add insulation, what will be the effect?
The problem we have encountered is there doesn’t seem to be any broad or specific independent information. We have contacted utilities and metal building, manufacturers. They all say you will see a temperature drop in the summer, and a more comfortable environment in the winter, without any specifics.
Image: Houston, TX
What does the insulation do?
It creates a radiant heat barrier keeping the hot air out of the building by not allowing the heat to radiate in. During the heat of the summer, the surface of the roof panels can get as hot as 140 degrees. Leather gloves and thick soles in boots are required to work on roofs during summer heat. By keeping out the radiant heat, the internal heat from the building has more space to occupy on the roof.
Roof vents and turbines are also helpful. These devices can provide information about how fast the air in a building can be exhausted. Their benefit is they are quiet and free.
The feedback we get varies because of the physical differences between the buildings. Also, many buildings have A/C installed as part of the renovation process. The other factors that affect the results are the height of the building and the ground-level ventilation if the walls are insulated.
Image: Houston, TX
Retro Insulation in a Metal Building Project in Iowa
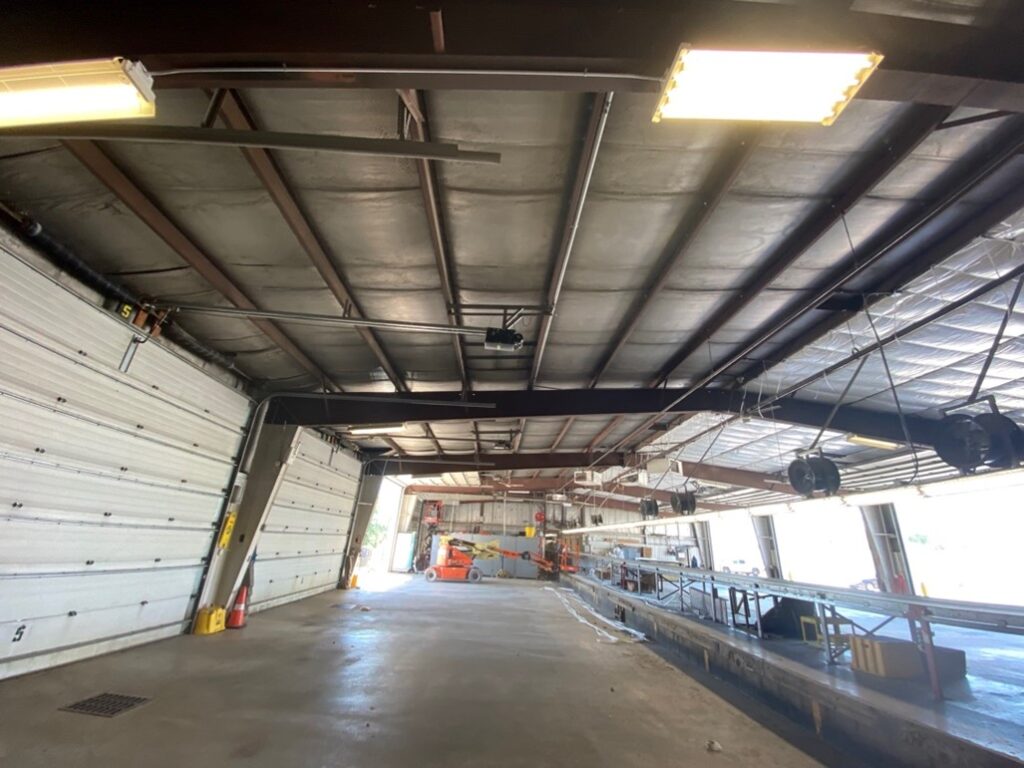
Before start of work at facility in Iowa
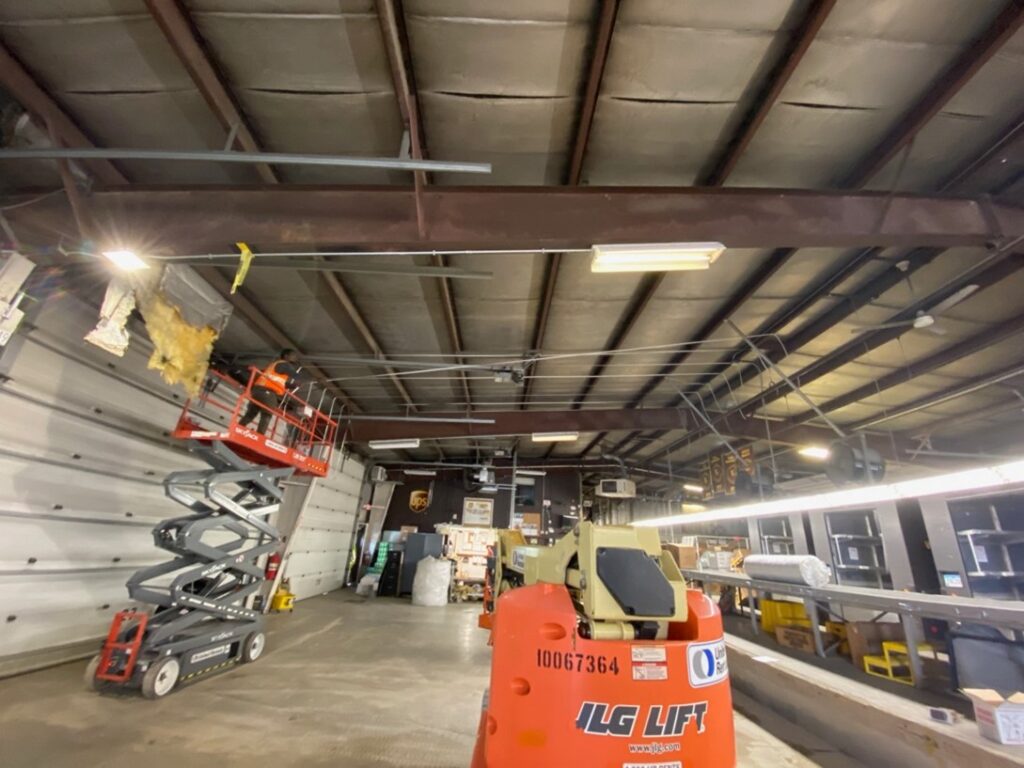
During Instalation
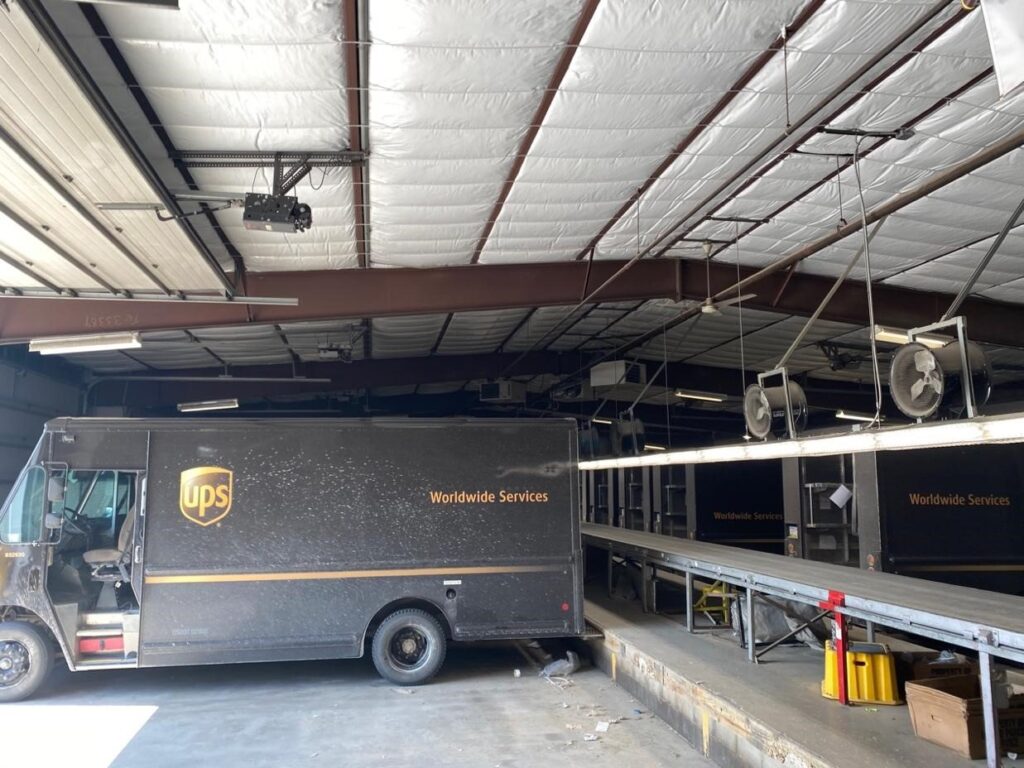
Installed 8” (R-25) of additional insulation at this UPS facility in Iowa, one of 4 facilities that we upgraded for them in IA. There was 3” originally, at completion R-34.
This a retro insulation in a metal building.
Based on our experiences and the feedback from our insulation company, expect a drop in temperature of 10 to 15 degrees during a hot summer day. After we have completed an insulation renovation, the workers in a newly insulated building will appreciate the environment.
Mason City, IA
Installation Process and Method Chicago Suburb
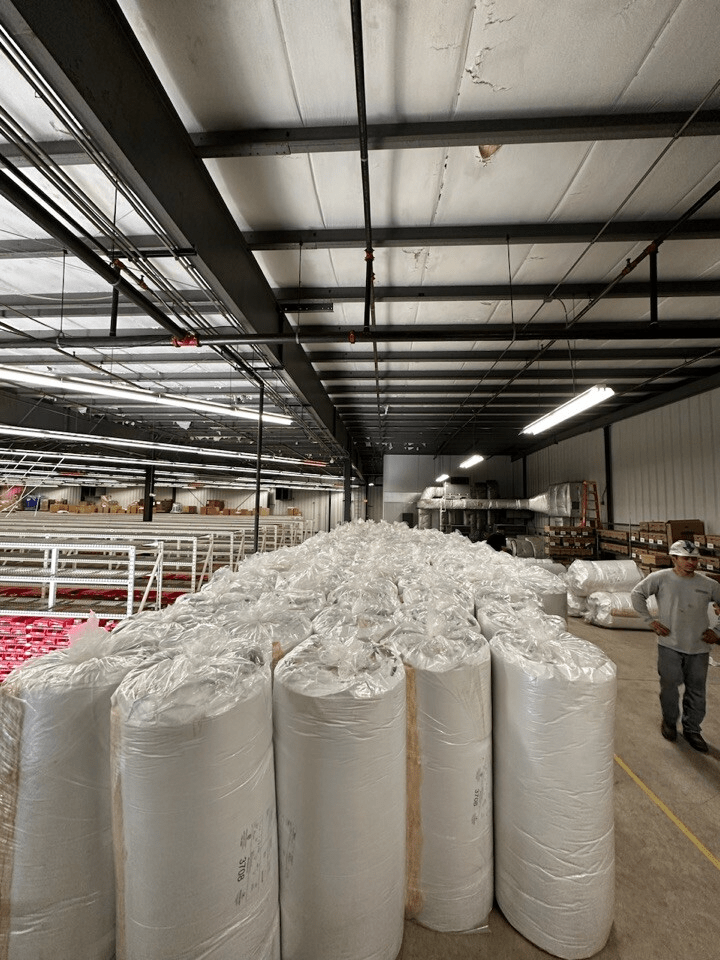
Here is what you can expect from Metal Guard, our process, and the results we achieve.
First, measurements are taken of each bay. The measurements include the length and width of each purlin cavity to be filled. The insulation length is from column to column. The insulation runs meet in the middle at the top of the column. Between the top of the column and the bottom of the roof. One insulation strip is snug up against the next. There are normally less than 10 different sizes for a project, they need to be organized for an efficient installation.
Image showing what insulation rolls look like delivered to a project.
Image: Waukegan, IL
Insulation organized
Before the insulation is installed, it needs to be organized based on the size required. Each run has a 3” tab on each side. The tab refers to the white facing being wider than the fiberglass insulation. The tab is pushed up against the side of the purlin. The tab, the 3” extra length of facing on each side hides/covers the side of the fiberglass and helps keep the face of the insulation as smooth as possible. The insulation in the picture is 8” thick, R-25. We are sometimes asked to install R-30, R-30 is 9 ½” of fiberglass.
Image: Waukegan, IL
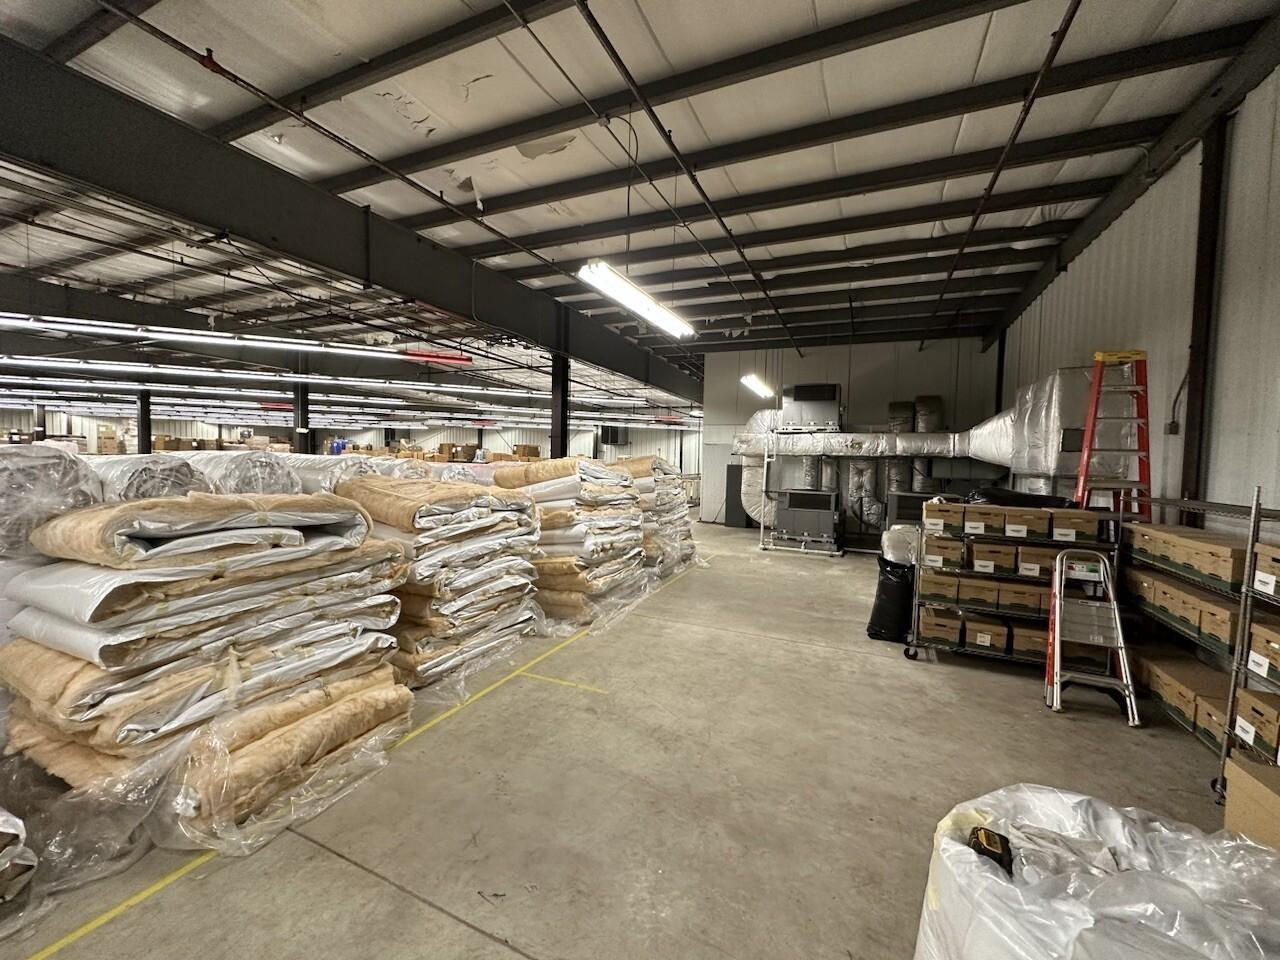
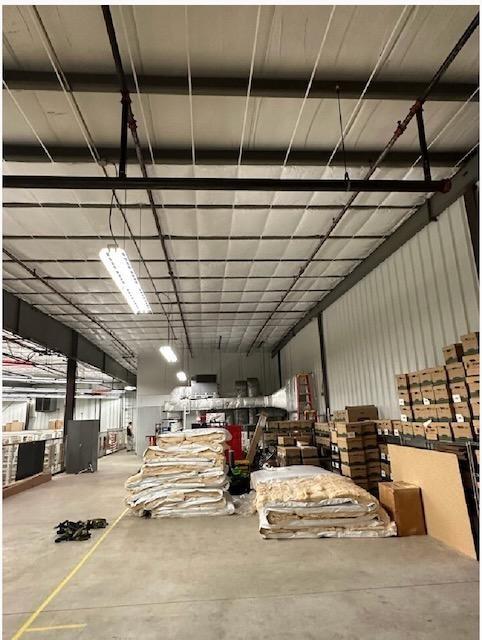
Straps are run and the insulation is installed.
We install the insulation a section at a time. After a bay is complete,
we clean it up and get out of your way.
Installation in progress. The first step is to lay out the strap pattern. Straps are installed 2’ on center and 6” from the columns. The insulation is made to match the lengths and widths of the bays. The different insulation strips are pushed tight to each other above the columns. The insulation is pushed and pulled to remove most of the wrinkles.
The extra quality of the installation takes a little more time.
The straps run continues from ridge cap to eave, at times the lines are interrupted by obstacles, but we take time to have them as symmetrical as possible.
Image: Waukegan, IL
Right: As the insulation is pushed into place, we cut slits into the existing facing. If two vapor barriers exist (two sets of facing) condensation will occur.
Image: Waukegan, IL
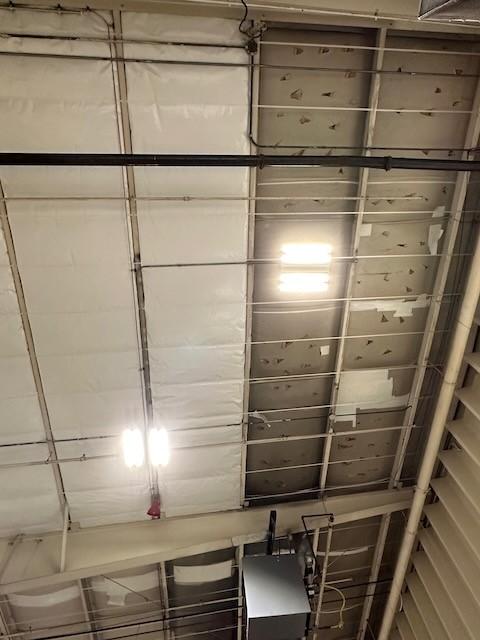
Pushing and pulling the insulation into place.
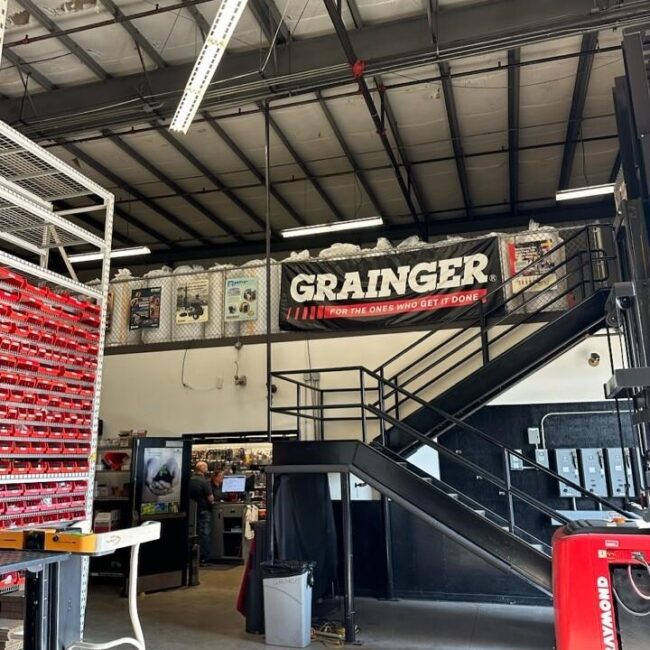
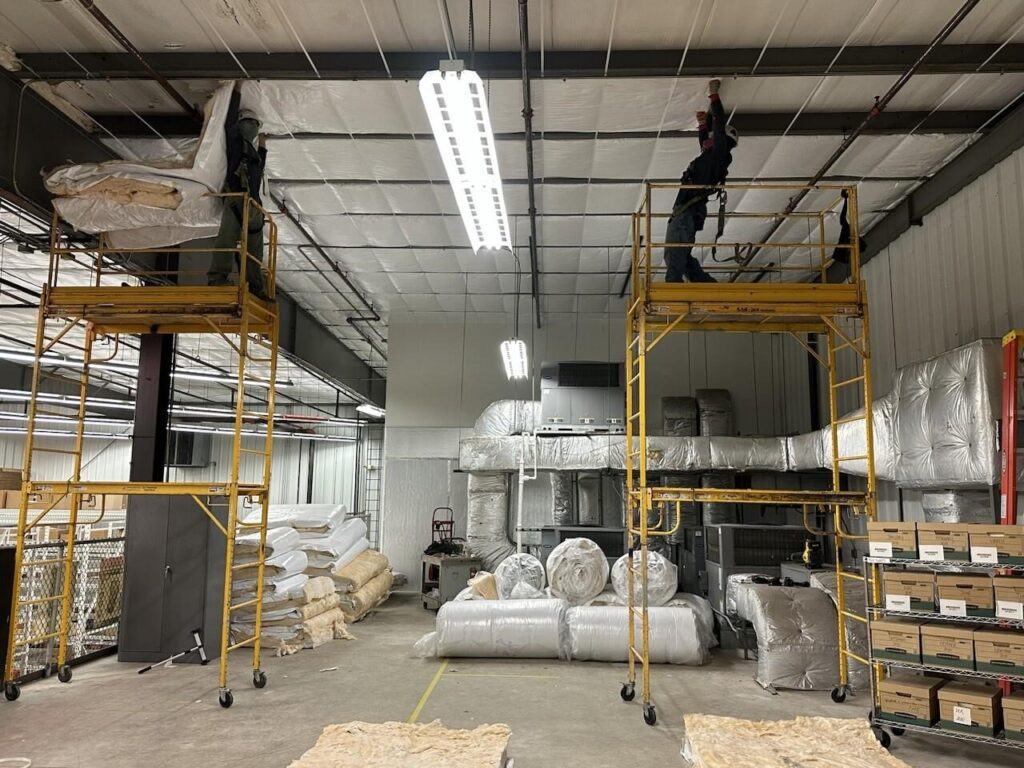
In the picture below we were working in a mezzanine area working off scaffolding. We use a combination of lifts and scaffolding as necessary to install. Below: Grainger Industrial Supply.
Insulation replacement in Marietta, GA
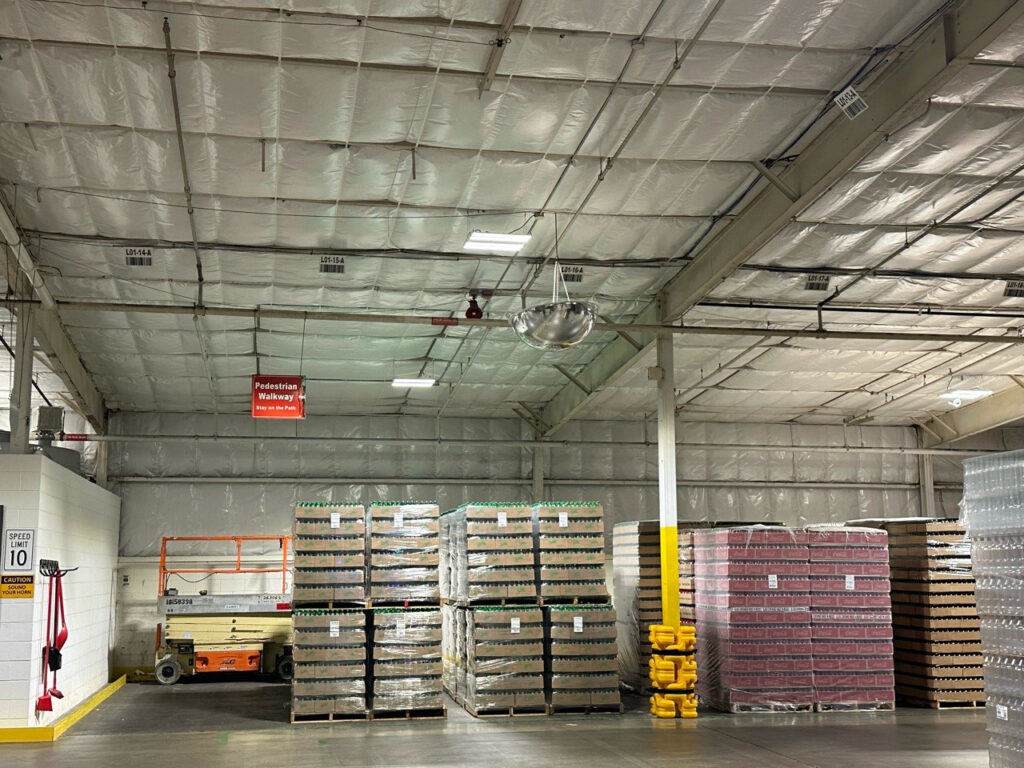
Below: Retro Insulation Installation with FDA compliant insulation for beverage bottling facility
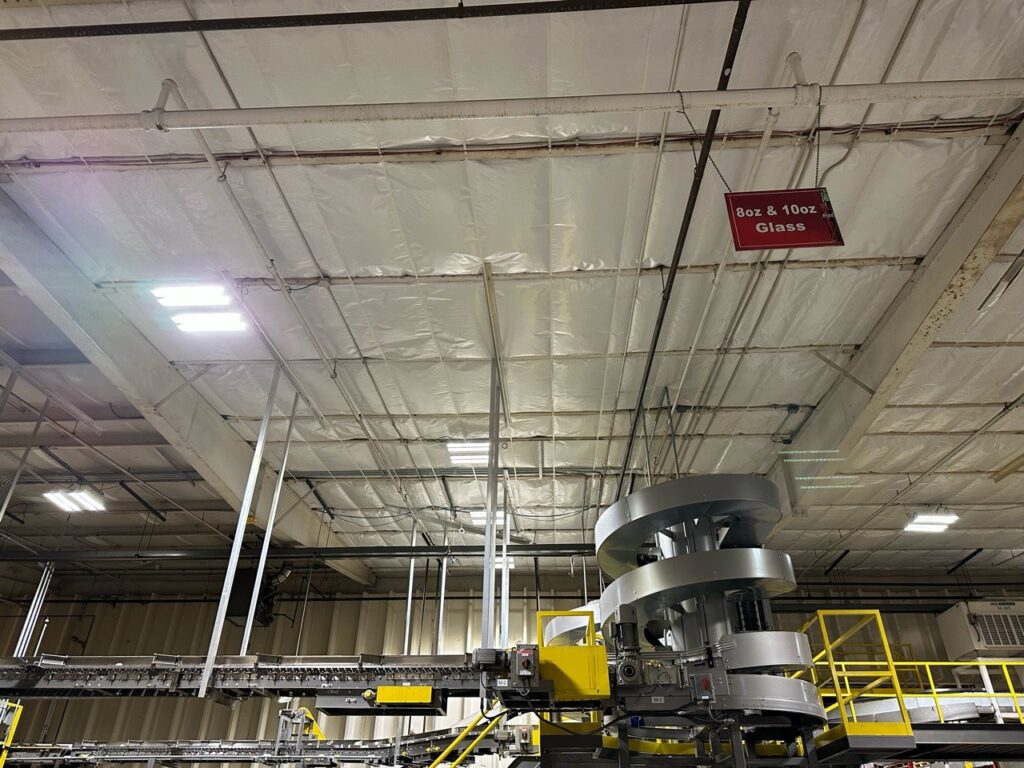
Below: Working in new insulation around complex machinery.
Retro installing insulation – The details make the difference.
Retro installing insulation – The details make the difference.
At the walls – the trim at the wall holds the insulation in place.
Insulation is heavy – without taking the time to install the proper amount of trim and flashing the insulation will drop and sag over time.
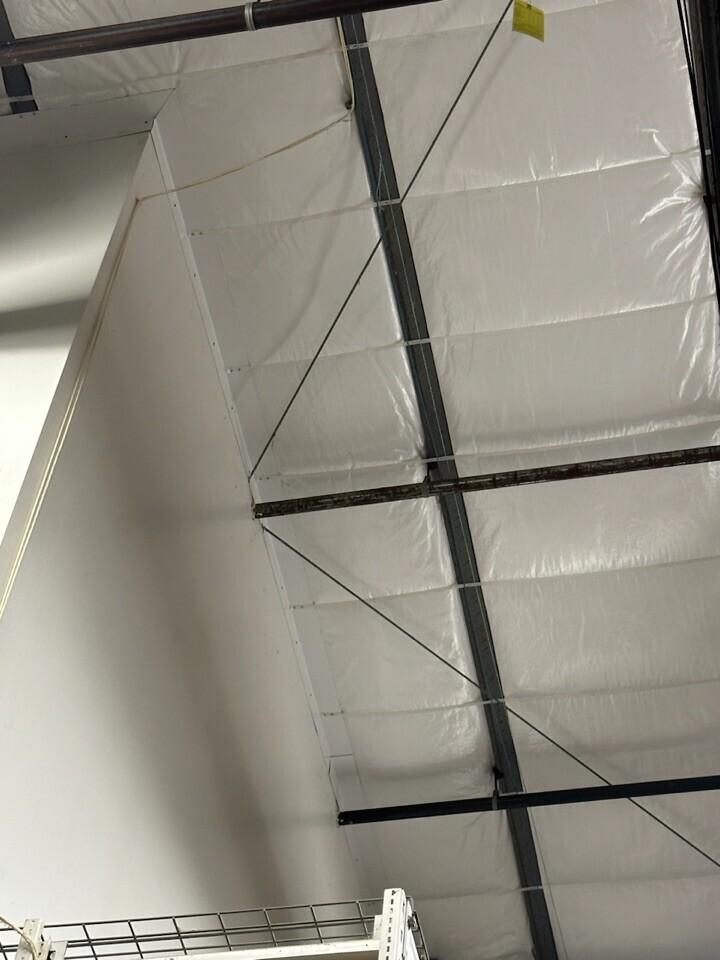
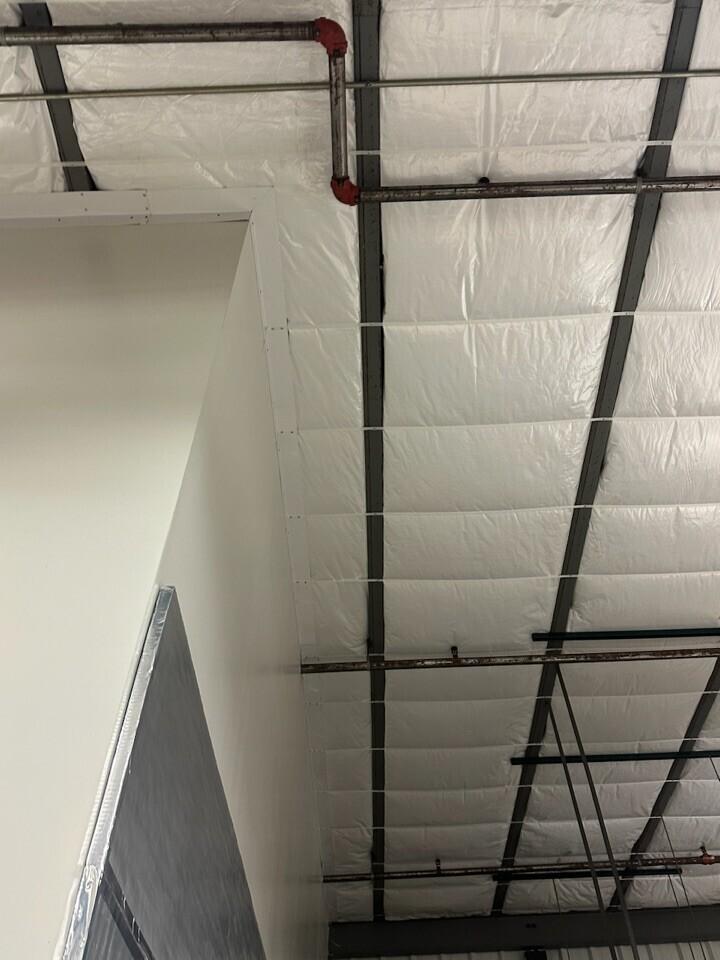
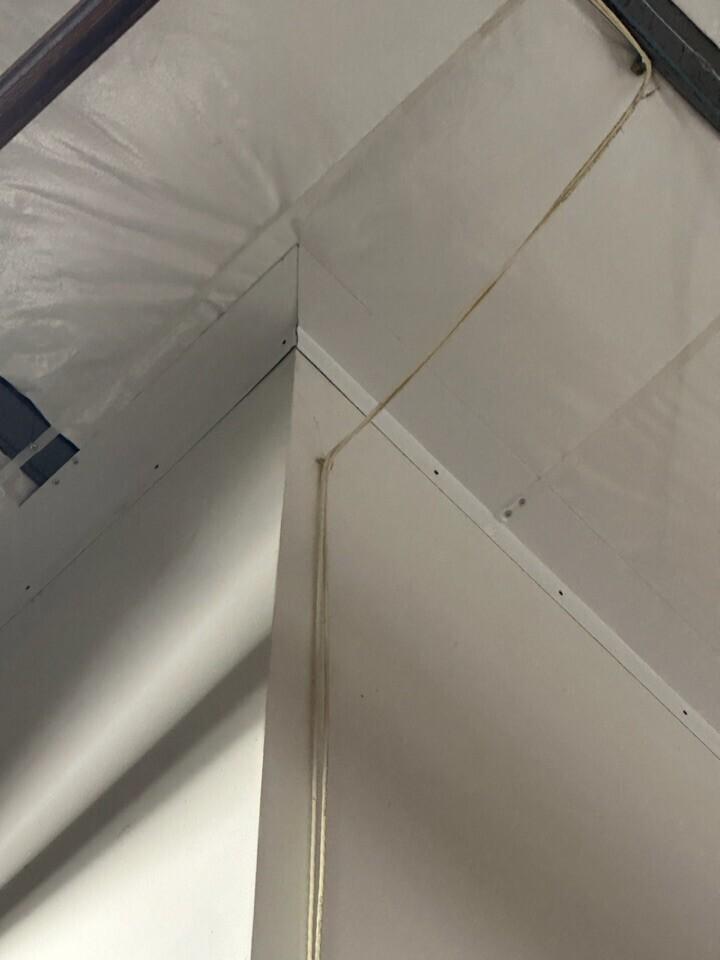
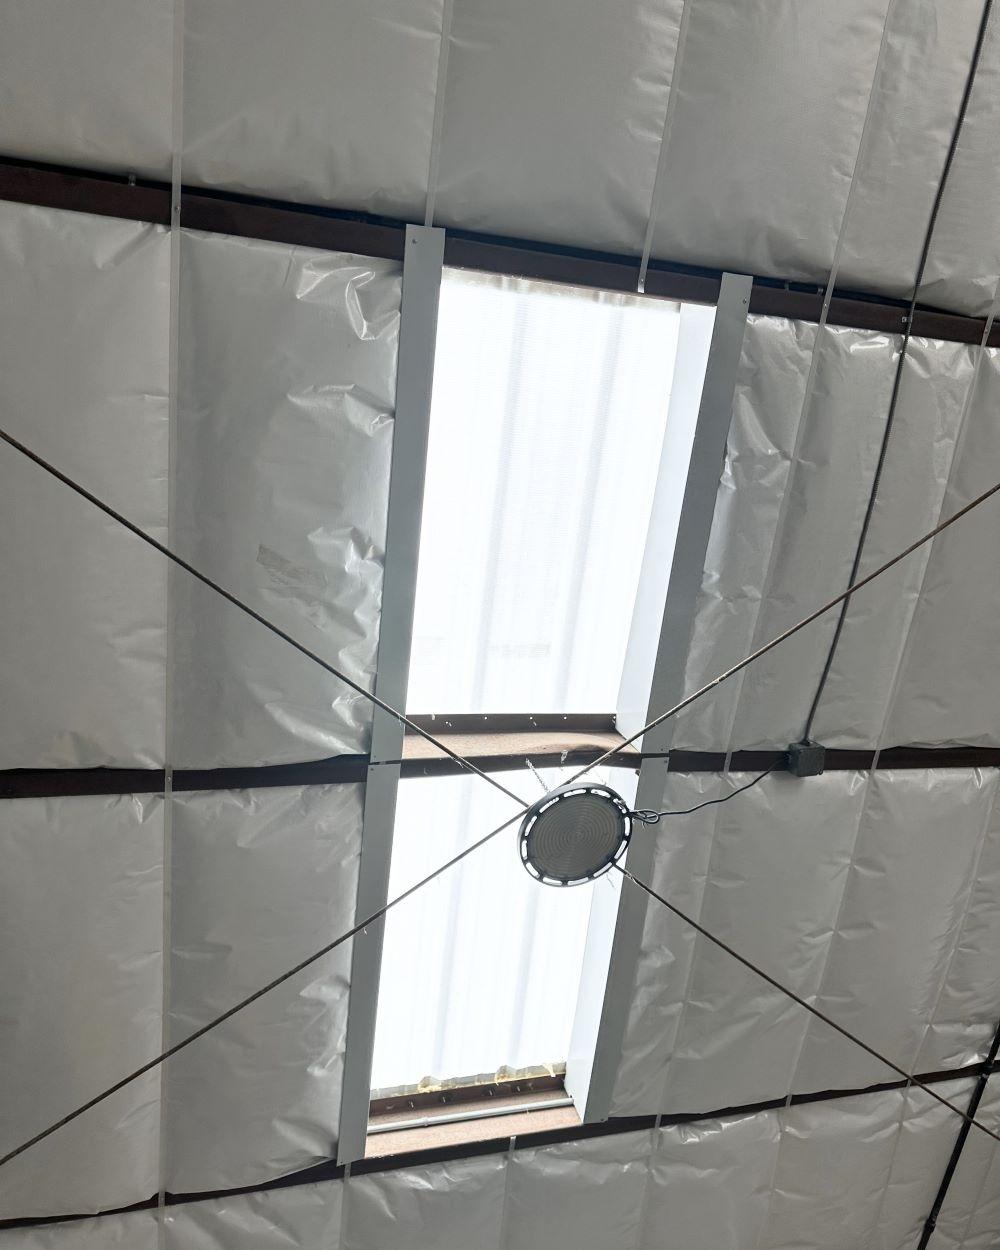
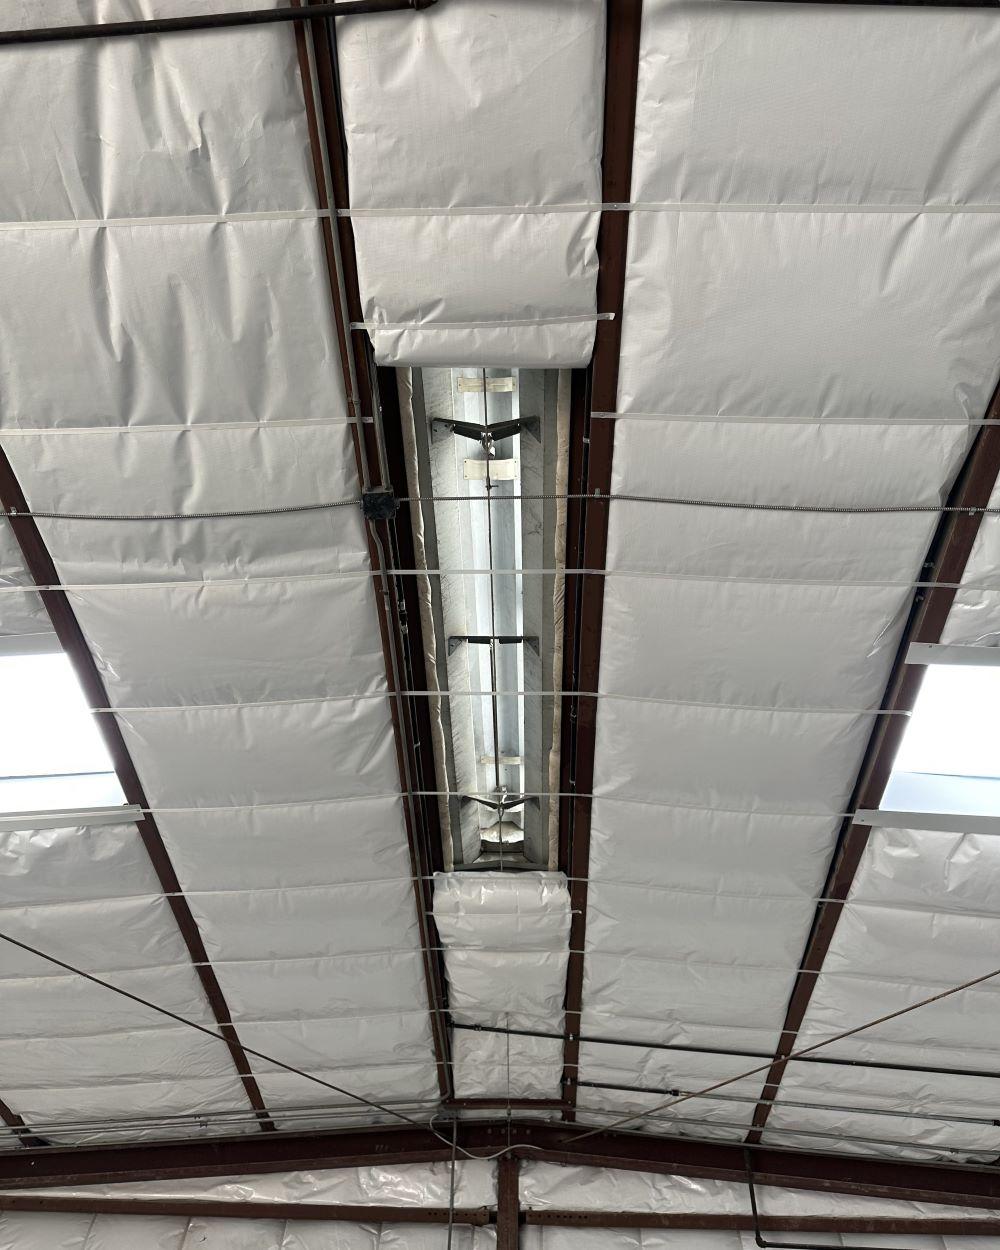
At ridge vents – extra strapping. Images – Baytown, TX
How to repair falling insulation - Insulation R value options
Have you asked; How is old white faced fiberglass insulation in a metal building repaired? Or what options are there for replacing old metal building insulation? Or how much does it cost to replace metal building insulation. We get calls all the time asking what the options are available to fix cracking or falling metal building insulation.
The price of fiberglass insulation, like most products over the last few years, has increased more than double in price. As a result, we have tried to offer options that provide more affordable options.
A few years ago, most of our retro insulation installations included 8” of fiberglass insulation with white facing. Now, we have begun offering varying thicknesses of insulation. For maximum R value we still recommend 8” of insulation. However, if the primary objective is to improve the appearance, we can install less than 8” at substantially lower cost.
Option #1 – Install facing only
This can be done if the insulation is still in place. If big sections have fallen, then the areas where the insulation has fallen must be cut out and 3” of faced insulation added. For the areas still intact a facing can be installed over it. OR unfaced added and then facing – give us a call and we can explain.
Option #2 – Add 3” up to 8” of faced insulation
The great majority of purlins are 8” tall, so 8” of insulation fills the void to the bottom of the purlin. While 8” of insulation provides the maximum R value, sometimes what you’re really trying to accomplish is just to improve the appearance. 3” offers a substantial cost savings over 8”. If an improved look is your goal, save the money.
The other question we are asked is – is there a difference in the look of 8” or 3” or facing only?
Yes, there is. 8” of faced insulation normally looks better than 3” of faced insulation because the 8” insulation option is flush with the bottom of the purlins. Although all retro insulation methods will have wrinkles, the way 8” lays it produces less wrinkles. The 3” option will produce condensation if it is flush with the bottom of the purlin.
A note about condensation: If you have airspace between the existing roof panels and the new insulation, or new insulation and old insulation condensation will occur, condensation will also occur if you have two vapor barriers, so the existing facing has to be perforated to allow it to breath.
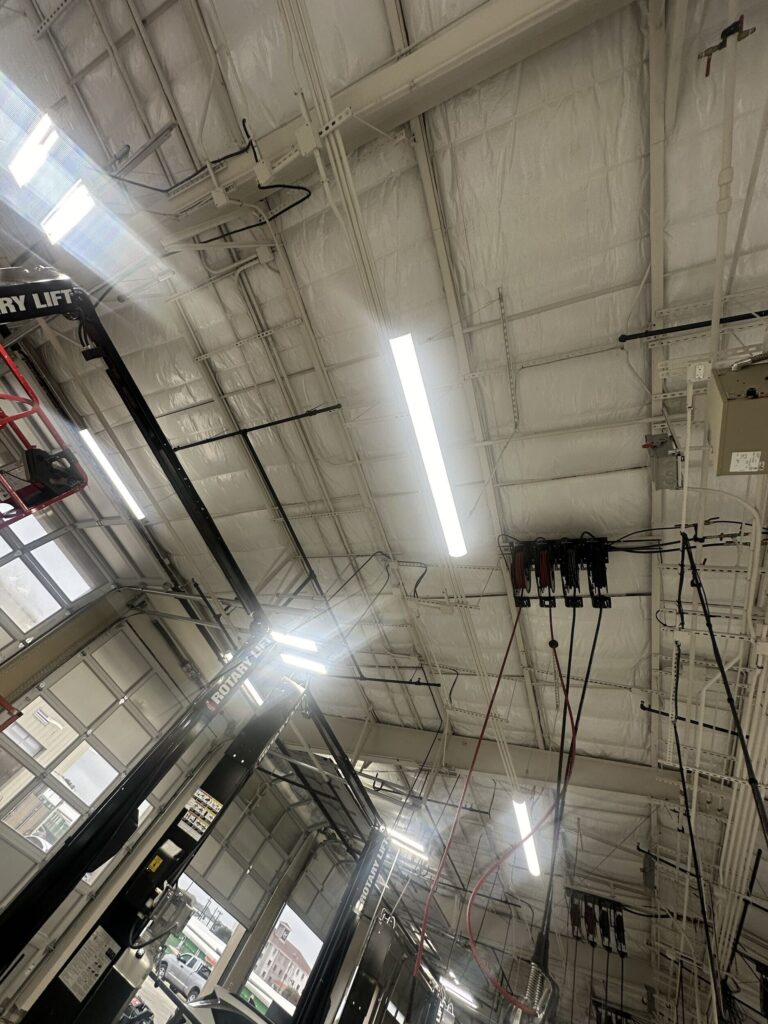
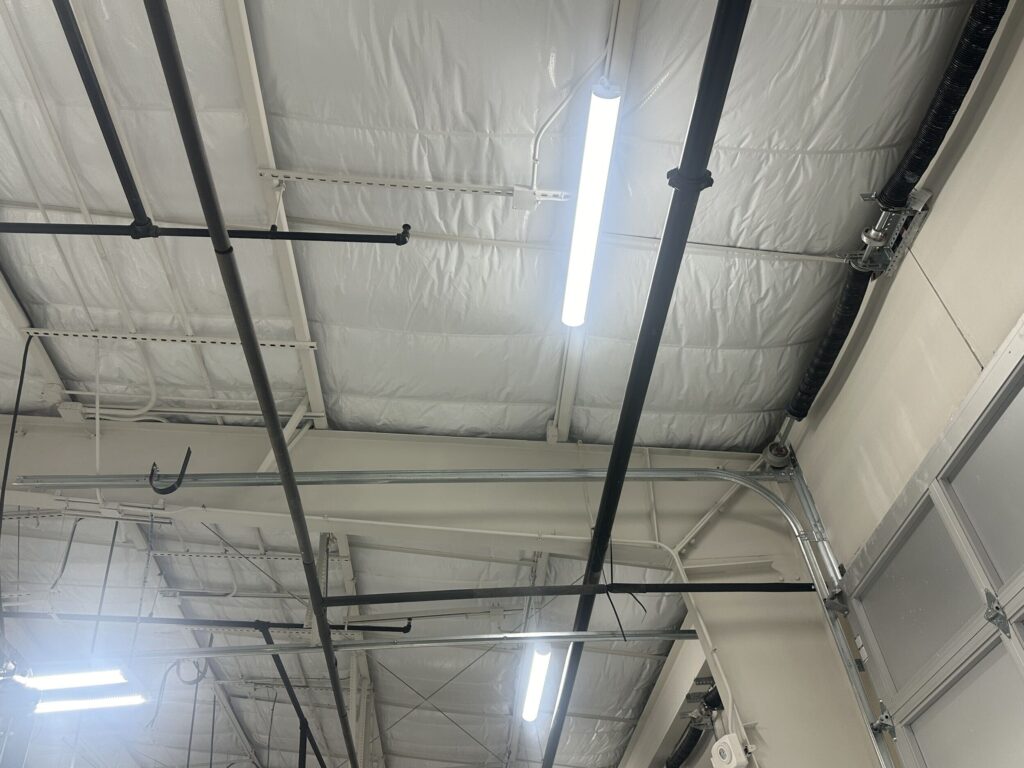
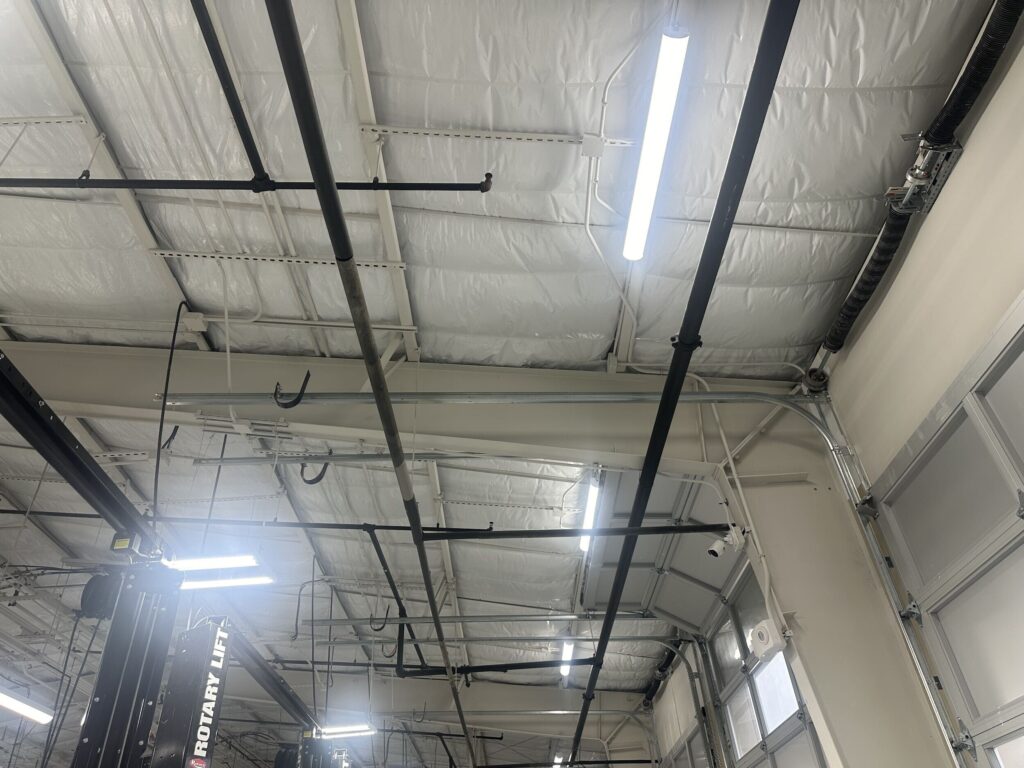
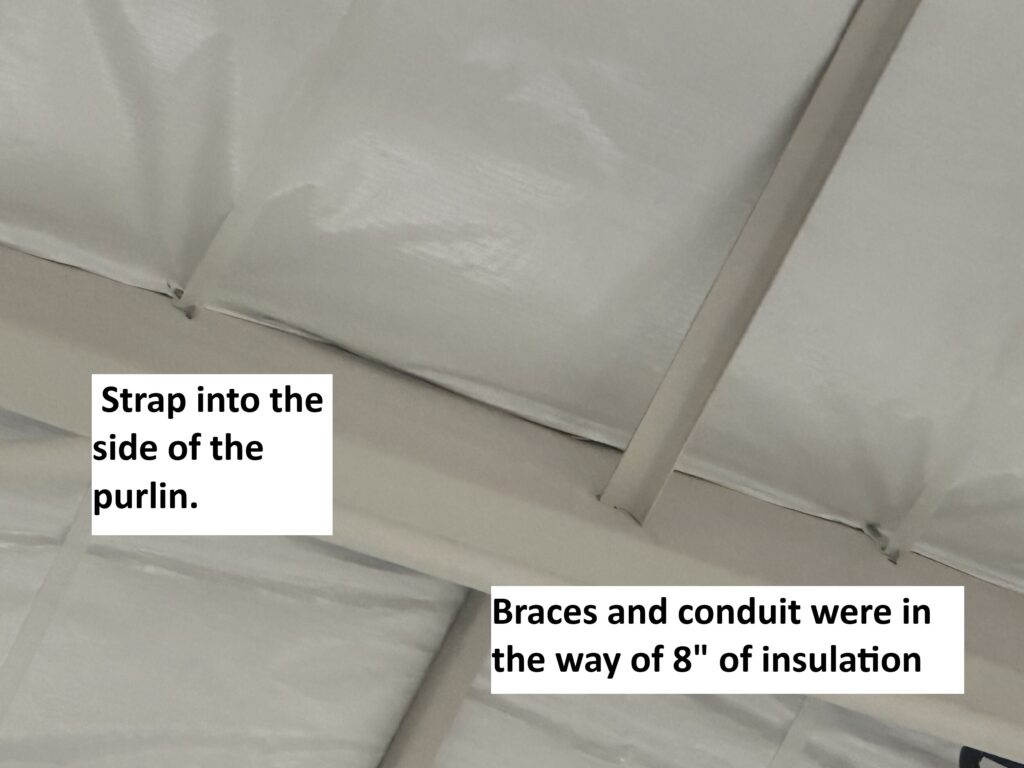
The pictures below are from in installation where we installed 3” of insulation over an existing 3” of insulation. There was so much conduit and bracing in between the purlins that it was the only reasonable way to improve the look. It has a lot of wrinkles – but the improvement in the appearance was dramatic.
For three inches of insulation the straps are fastened into the side of the purlin. For 8” of insulation the fasteners are installed into the bottom edge of the purlin.
JOB PROFILES
Call or Email To Get a Price Quote on the Cost of Materials To Install Retro- Insulation
The installation of this can be tricky.
We do travel for this service. We can help control both the cost and, at the same time, provide a very high-quality installation.


